Preserving
-
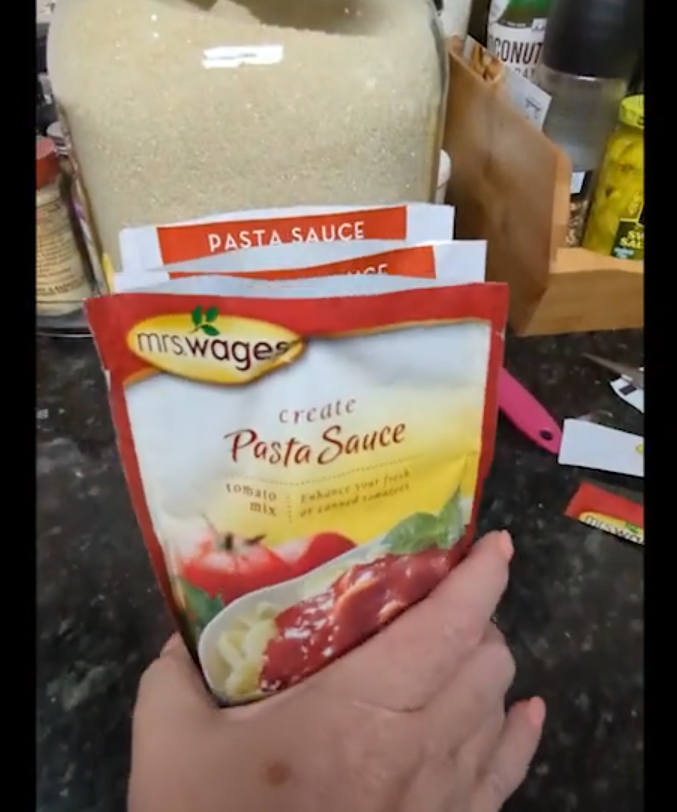
Mrs. Wages Pasta Sauce
How to Make Delicious Homemade Pasta Sauce Using Fresh Tomatoes and Mrs. Wages Seasoning
Creating a delicious pasta sauce from scratch can be an enriching and satisfying experience. If you have an abundance of fresh tomatoes and want to preserve their amazing flavor for another day, this guide is perfect for you. Using Mrs. Wages Pasta Seasoning, you’ll learn how to turn fresh produce into a delightful sauce that’s perfect for spaghetti or pizza.
Preparing the Tomatoes
Gather Your Ingredients
To start, gather the following:
- Fresh tomatoes (approximately 6 lbs.)
- Mrs. Wages Pasta Seasoning packet
- 1/4 cup of sugar
- Vinegar (for cleaning jar rims)
Tomato Preparation

- Skinning the Tomatoes:
Begin by preparing your fresh tomatoes. The goal is to remove their skins, which can be done efficiently by roasting them. Place your tomatoes in a large roasting pan lined with foil pans, and gently heat them. This method is significantly easier than the traditional water bath technique. - Quarter and Core:
After removing the skins, quarter your tomatoes and core them. This will help ensure a smoother sauce. - Cook Down:
Transfer the tomatoes to a large pot and cook them down. Use an immersion blender for a consistent texture.
Creating the Sauce
Mixing Ingredients
- Sweeten the Sauce:
Once the tomatoes are cooked down, add 1/4 cup of sugar to balance their acidity. - Flavor with Seasoning:
Stir in Mrs. Wages Pasta Seasoning packet. These packets are designed specifically to enhance the tomato base with classic Italian flavors, turning your fresh sauce into an authentic pasta delight.
Simmer to Perfection
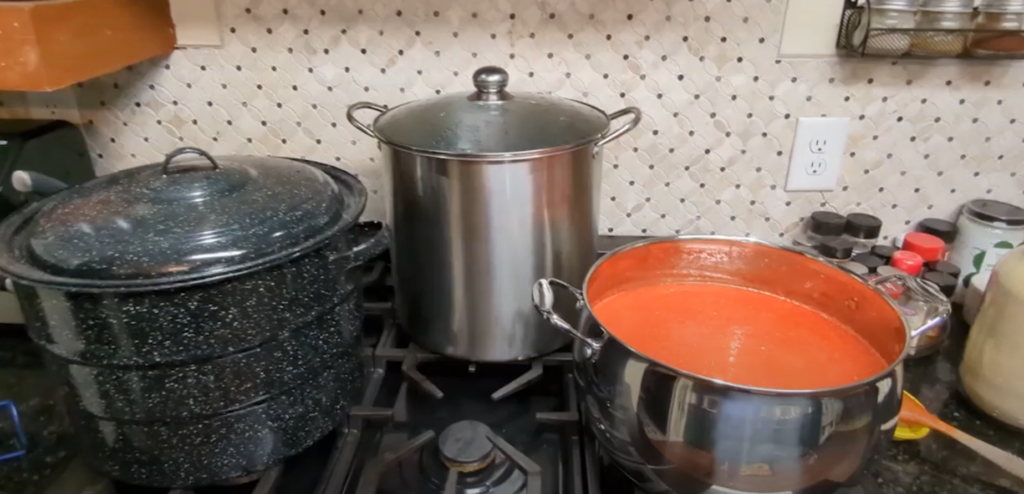
Simmer the sauce at a gentle heat, allowing the flavors to meld beautifully. If you’re making a small batch, your sauce may be ready to serve. However, for larger batches, follow along to learn how to can and preserve your creation.
Canning the Sauce
Prepare for Canning
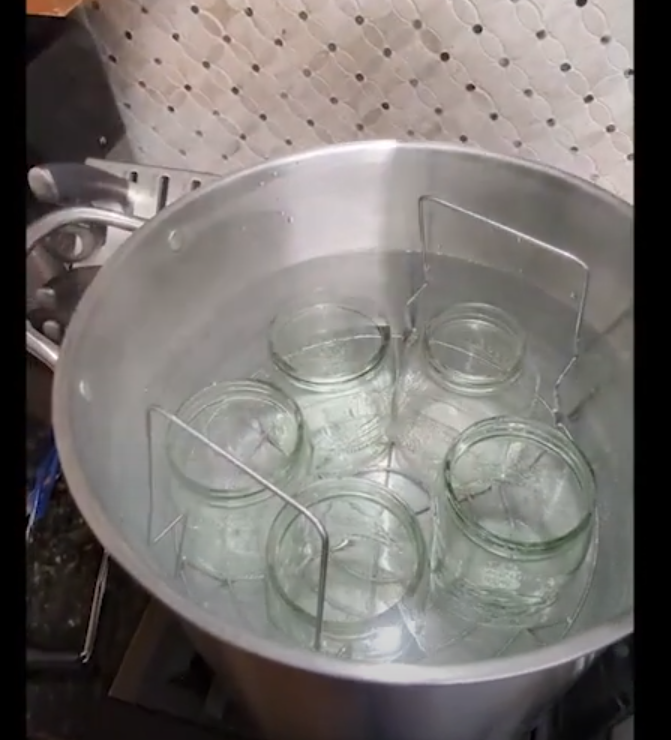
- Organize Your Equipment:
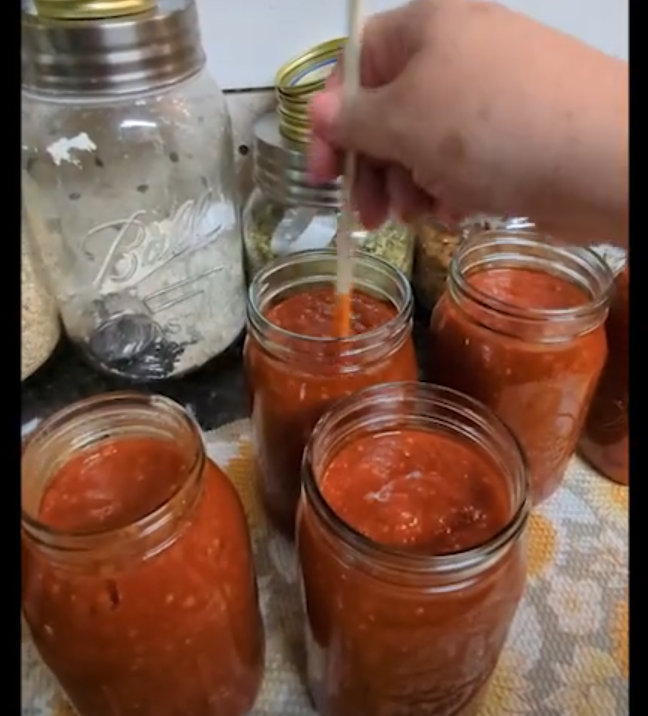
Before canning, gather water bath canners, jars (quart or pint-sized), and superb lids like the Azure standard jars and lids, known for their durability. - Fill the Jars:
Carefully ladle your hot sauce into the jars, leaving about one inch of headspace. This will allow for proper expansion and sealing during the canning process.

Water Bath Canning

- Process in the Canner:
Ensure your jars are properly sealed with superb lids and place them in the water bath canner. For pint-sized jars. Remember: process for 40 minutes, and for quart-sized jars, process for 45 minutes. - Cooling Down:
After processing, allow the jars to cool slowly inside the canner before removing them. Let them rest for another 12 to 24 hours.

Final Steps
- Check the Seal:
Once cooled, remove the bands and check the lids. If they are securely sealed, your sauce is ready to store. - Store Properly:
Store your canned pasta sauce in a cool, dark place. When ready to use, simply open a jar and enjoy your homemade sauce with any pasta or dish of your choice.
Tips for Optimal Results
- Use Quality Jars:
If available, opt for Azure standard jars, which provide more durability compared to other brands like Ball jars. - Maintain Cleanliness:
Always wipe the rims of your jars with vinegar before sealing to ensure a clean environment and a good seal. - Reuse with Care:
Consider using reusable superb lids to reduce waste and additional expenses.
Canner: https://amzn.to/3WKmBmt (much cheaper at Walmart)
Canning Kit: https://amzn.to/3nrwO9L
Organic Distilled White Vinegar: https://amzn.to/3NV988q
Mrs. Wages: https://amzn.to/4fGrSEs
Azure Standard Canning Jars and lids found here: https://www.azurestandard.com/?a_aid=4f458cfbd1
With these steps, you’ll not only have a flavorful homemade pasta sauce but also preserve the essence of fresh tomatoes for months to come. Follow this guide to make the most of your ingredients and enjoy the delightful taste of homemade sauce anytime! For reference, this recipe was tripled in this video.
-
Let’s Nesco Pressure Can Some Mixed Chicken
Here’s the index for you everyone:
00:23 Costco haul insights.
02:10 Late dinners during gardening.
05:37 Using wide-mouth quarts.
09:21 Adjusting meat quantity.
12:26 Canning process demonstration.
14:56 Checking sealed jars.Mastering Nesco Smart Canner – Conquering the Chicken Canning Game!
Hey All,
Exciting news – I scored a fantastic deal on chicken during my latest Costco haul! Ready to share the thrill with a deep dive into pressure canning using the Nesco Smart Canner.
In this video, I share Costco haul insights, “spill the tea” on my canning motivation, and guide you through the ins and outs of the Nesco Smart Canner. Smooth sailing all the way, even tackled a minor hiccup like a pro. If you’re a canning enthusiast or considering trying it out, this one’s tailored for you.
Hit that subscribe button if you haven’t already. Your ongoing support is truly appreciated!
Feel free to drop your thoughts or any burning questions in the comments.
Here’s to conquering the day!
– Brandy
SowingBack -
Honey Fig Preserves and Fig Harvest
My husband’s grandmother, Louise, was known for her figs that she grew for years. His grandparents
had a small vegetable stand that folks would stop by to get good homegrown food. Louise’s figs were
one of the items folks looked forward to getting each year during fig season in north Georgia. I still
remember tasting my first fig. Yes, from Louise…I had never had one before and my word was it ripe and
delicious. I would have been in my early twenties, and I can still remember being in her old kitchen when
she went to get the figs out of the fridge. She is the one that told me to put them in the fridge to help
them last a little longer.Louise taught me so many things in my young married life…how to remove wallpaper and then, how to
cut and hang wallpaper (I think she was in her mid to late 70’s when she did that). She also tried to teach
me to sew, refurbish furniture, and of course she would share cooking recipes. She made the best pecan
pie I have ever eaten and the last piece I ever had on this side of heaven, since I developed a nut allergy.
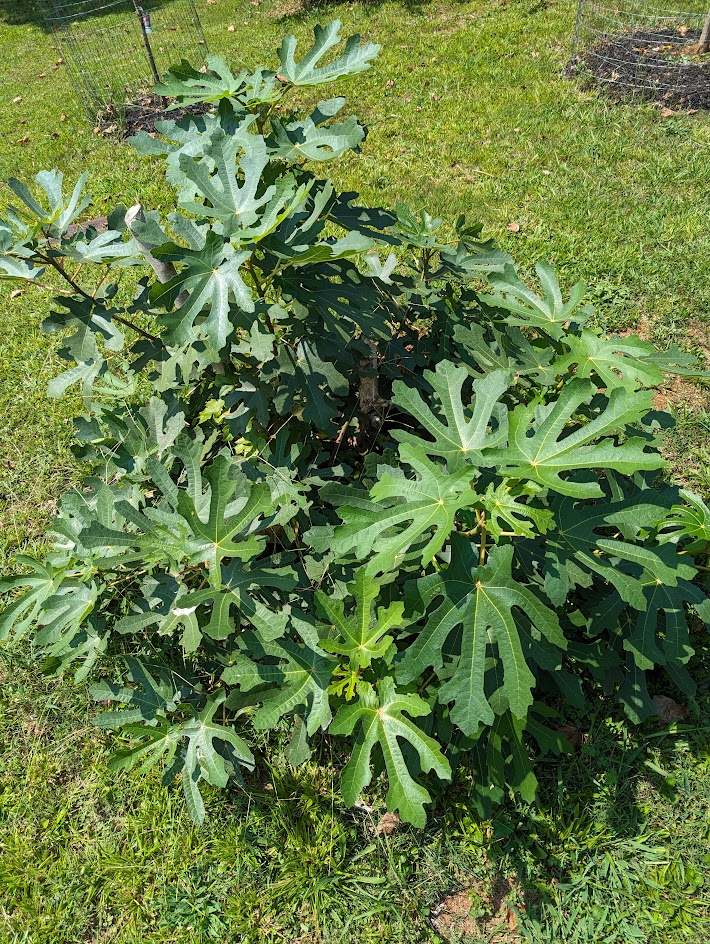
She was such a treasure. When Louise passed away, I planted my first fig (a black mission) in honor of
her. We thought we might have lost our precious fig in last Christmas’ deep freeze. All our figs took a hit
as did many other plant favorites, but early this summer Louise’s Fig started putting on new leaves and
is looking quite healthy now as we head into fall.As you can imagine Johnny and I were both relieved to see her bring forth new healthy growth. We only
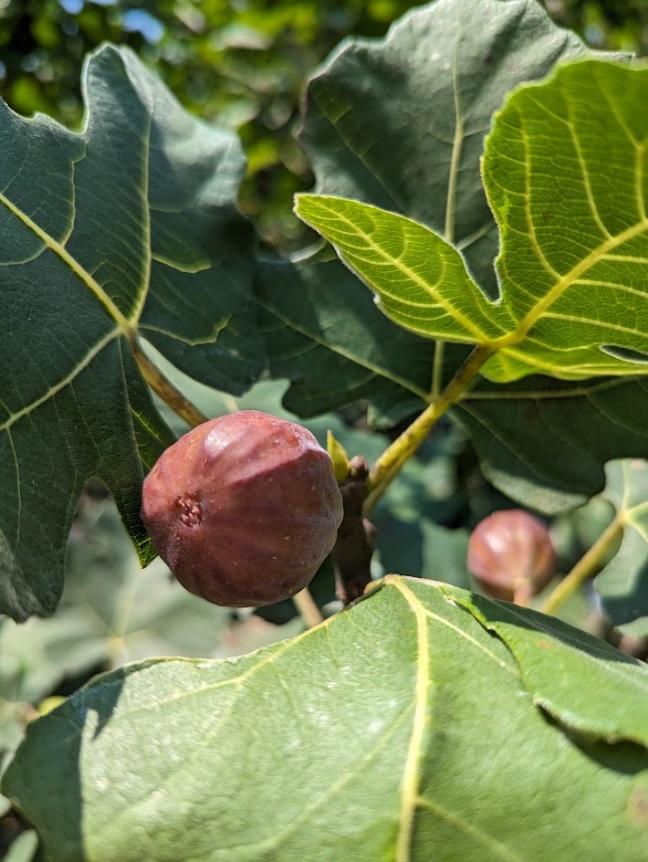
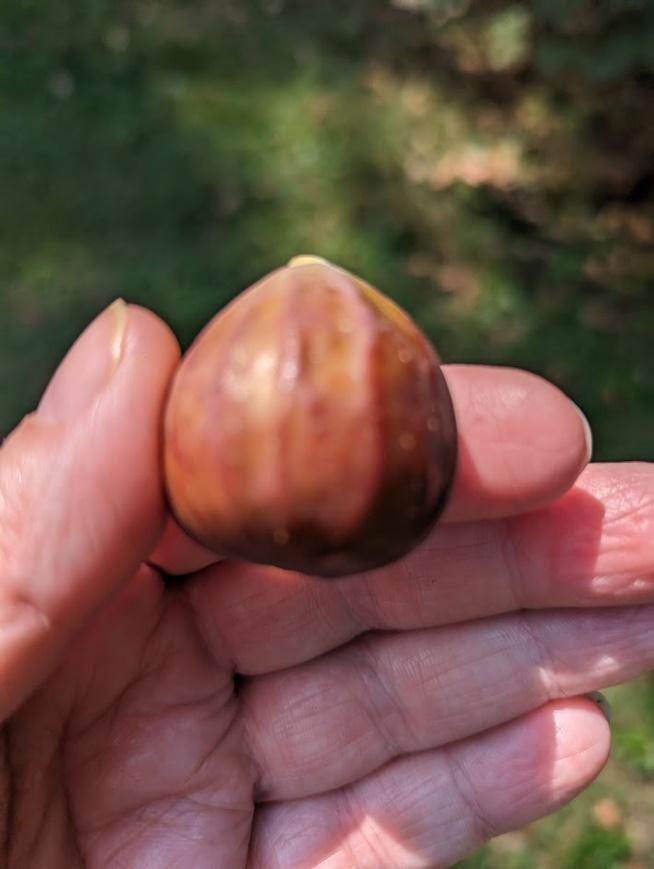
had one of our figs this year which was a shared tree with our neighbors that produced any figs. It is abrown turkey fig. I went out about a week ago as the figs were becoming rip. When a fig is ripe it will
start the bending process. If you allow it to bend too far the birds, bees, and ants will enjoy it, but if you
pick them at the halfway bend point, you will have a tasty ripe fig to enjoy.One of the big questions you hear a lot about figs is the fact that they are higher in sugar, so can that be
good for you especially if you have blood sugar issues. In fact, figs are higher in sugar; however, they are
also higher in fiber which means the fiber helps to balance out the sugar impact. Remember fiber is
always our friend! It is also important to remember to add some protein to balance your figs out such as
a nice plain Greek yogurt. This will make a fantastic snack. Figs are full of vitamins and minerals such as
A, C, B6, K, Calcium, Iron, Potassium, Magnesium, Copper, Riboflavin, and Strontium. Eating foods with
said nutrition is far better than buying expensive supplements.
Figs are good for
Digestive health
Heart health
Skin health
Bone health
Fig leaves are also good for you when dried and made into tea. Studies have shown that the leaves help
with blood sugar control. As with any food, it is good to enjoy when in season. The only downside to figs
is if you take blood thinner medicine, to only consume in small amounts as the higher vitamin k can
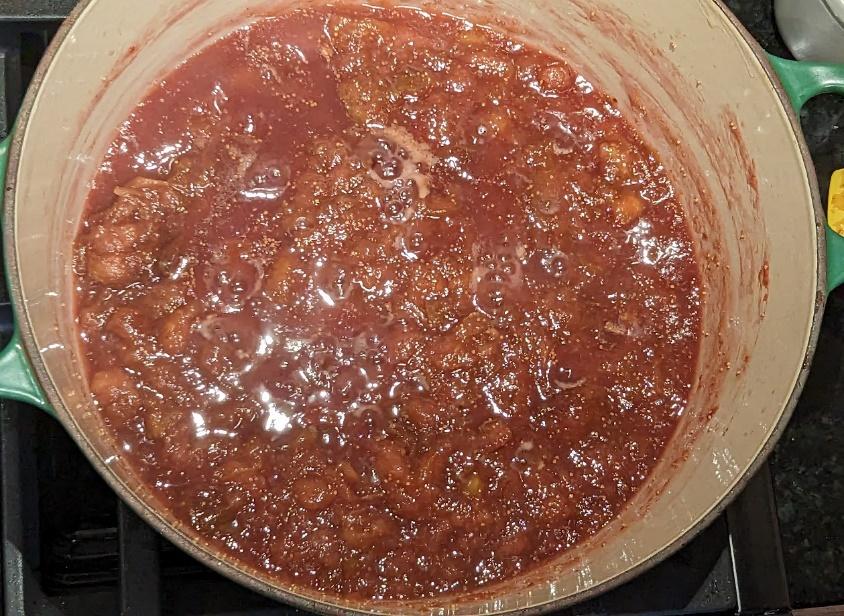
interfere with your medicine’s absorption.This year with our reduced fig harvest, I decided to make a small batch of honey fig preserves. I love this
recipe because it is perfect to put a spoonful over my morning Greek yogurt. It adds a little sweetness
but not super sweet. I hope you will give it a try.Honey Fig Preserves
2lbs of fresh figs (frozen ones will work to)
2/3 cup of honey (I use Alapaha Honey)
1 cup of water (maybe a little less if frozen)
3 TBSP of lemon juice
~Wash figs well and snip stems off.
~Place all ingredients into a pan and bring to a boil (I like to mash my figs first).
~Reduce heat and simmer until figs reduce to a thick jam/preserve and gel on the back of a cold spoon.
This takes about 40 to 45 minutes. Make sure to stir to keep from sticking.
~Jar up and use for fresh eating or freeze it for a longer shelf life.