
cooking
-
Easy Crockpot Blackberry Jam
- 00:03 🍇 Prep & Inspiration
- Preparing frozen blackberries, inspired by a tasty Grilled Cheese.
- 02:30 🚀 Crockpot Jam Method
- Introducing a new crockpot method for blackberry jam.
- Setting on low for 3 hours, curious about the outcome.
- 05:53 🍲 Crockpot Success
- Successful tripling of the recipe, yielding 12 jars.
- 07:05 🥄 Jam on Yogurt
- Sampling jam on zero-fat Greek yogurt.
- 08:42 🍓 Jam Jar Showcase
- 11:49 🎁 Jam Gifting Tips
- What do they look like!
Delicious Homemade Blackberry Jam – A Winter Solstice Treat
Hey Everyone,
I hope this day finds you well. I wanted to share a delightful experience from my recent YouTube video, where I made Easy Crockpot Blackberry Jam.
In the video, I explored the process of preparing 5 lbs of frozen blackberries from Azure, sharing insights on the importance of adding lemon juice for acidity. The inspiration behind this batch was a divine Blackberry Bacon Cheddar Grilled Cheese I tried at a local sandwich shop during a recent outing with John.
The highlight of the video was experimenting with a new crockpot method for making blackberry jam. I tripled the recipe, combining 3 and 1/2 cups of sugar with 3/4 a cup of lemon juice, and let it simmer for 3 hours. The result was 12 beautiful jars of jam, perfect for gifting and personal use.
I also added a creative way to enjoy the jam by adding it to zero-fat plain Greek yogurt, so it has healthier ingredients and lower sugar content (but still tastes good). I think you’ll see the satisfaction of successfully making and experimenting with crockpot jams, promising more delightful recipes in the future. It’s really nice when you make your own jam. Rewarding, at least to me.
If you’re interested in trying this out or simply want to enjoy the process, you can watch the full video here (or just click above).
Wishing you a cozy Winter Solstice filled with warmth and homemade treats!
Best regards,
Brandy
- 00:03 🍇 Prep & Inspiration
-
How to Make Blackberry, Jalapeno, & Bacon Grilled Cheese (a new take)
TL;DR
- 00:03 🍞 Preservation Sandwich Inspiration
- 01:10 🌶️ Creative Grilled Cheese
- 02:05 🍞 Sourdough Choice and Cooking
- 04:00 🧀 Layering and Cooking Demo
- 07:28 🍽️ Well, How does it Taste
- 09:53 📈 Encouragement to Try the Sandwich (Don’t just watch the video!)
Hey everyone. Hope you had a good Christmas. I have a new sandwich for you, so get ready to elevate your sandwich game with an exciting twist – a flavorful grilled cheese creation I recently explored on my YouTube channel. Inspired by a visit to a charming sandwich shop, the star of the show was a bacon-blackberry jam-jalapeno grilled cheese that left a lasting impression.
Beginning with my homemade blackberry jam, a personal favorite, I felt compelled to recreate this delightful sandwich, highlighting the perfect blend of sweet, salty, and a hint of heat. What sets this apart is the choice of sourdough bread, adding a wonderful texture to the mix.
Armed with a trusty cast-iron skillet, some deli cheese, Costco pre-cooked bacon, and the last of my jalapenos, I took my viewers through the step-by-step assembly process. The result? A mouthwatering creation boasting the irresistible melty goodness of jam and a perfectly crusty exterior.
As I indulged in a satisfying bite, I couldn’t help but encourage my viewers to embark on their culinary journey. Whether you’re using homemade or store-bought jam, this warm and flavorful sandwich, especially on a cold day, exemplifies the joy of thinking outside the box. Honestly, y’all. The sandwich is good. John liked it too.
Join me in elevating your sandwich experience by embracing the unexpected—combining sweetness, savory richness, and a touch of heat—all in one delightful grilled cheese. Whether you’re a seasoned subscriber or new to my channel, I promise an exciting venture into the world of sandwich-making. Here’s to a flavorful and happy New Year ahead! – Brandy
-
Honey Fig Preserves and Fig Harvest
My husband’s grandmother, Louise, was known for her figs that she grew for years. His grandparents
had a small vegetable stand that folks would stop by to get good homegrown food. Louise’s figs were
one of the items folks looked forward to getting each year during fig season in north Georgia. I still
remember tasting my first fig. Yes, from Louise…I had never had one before and my word was it ripe and
delicious. I would have been in my early twenties, and I can still remember being in her old kitchen when
she went to get the figs out of the fridge. She is the one that told me to put them in the fridge to help
them last a little longer.Louise taught me so many things in my young married life…how to remove wallpaper and then, how to
cut and hang wallpaper (I think she was in her mid to late 70’s when she did that). She also tried to teach
me to sew, refurbish furniture, and of course she would share cooking recipes. She made the best pecan
pie I have ever eaten and the last piece I ever had on this side of heaven, since I developed a nut allergy.
She was such a treasure. When Louise passed away, I planted my first fig (a black mission) in honor of
her. We thought we might have lost our precious fig in last Christmas’ deep freeze. All our figs took a hit
as did many other plant favorites, but early this summer Louise’s Fig started putting on new leaves and
is looking quite healthy now as we head into fall.As you can imagine Johnny and I were both relieved to see her bring forth new healthy growth. We only
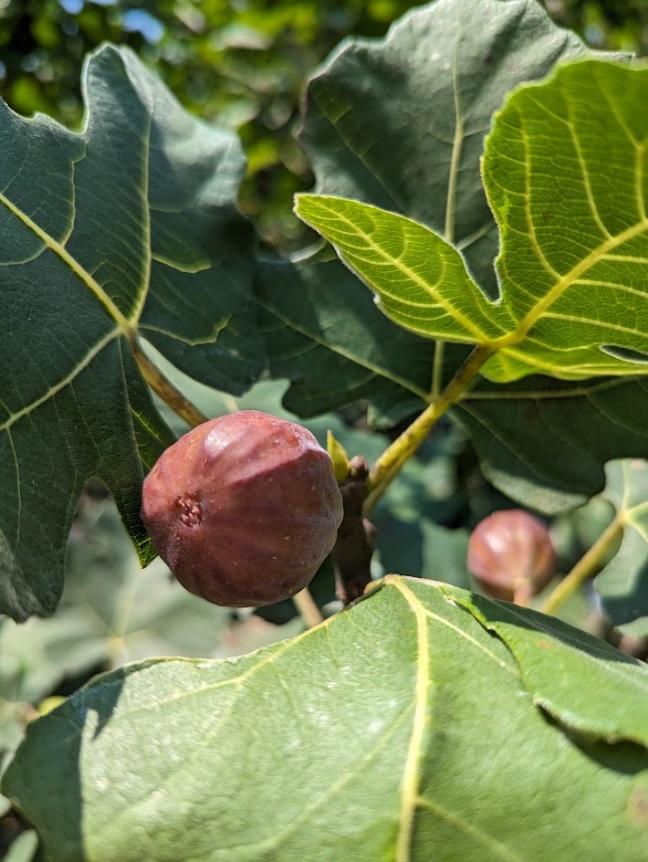
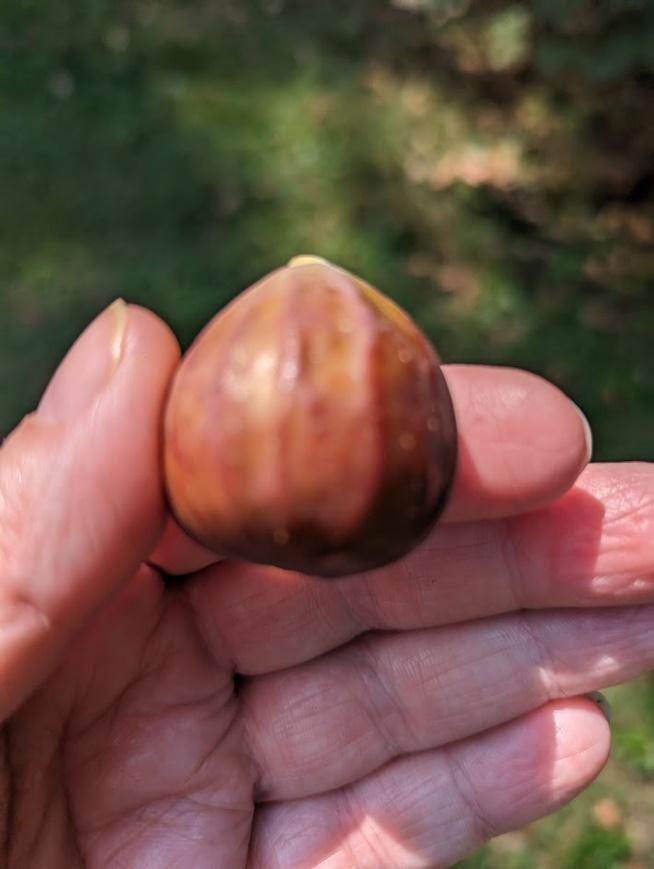
had one of our figs this year which was a shared tree with our neighbors that produced any figs. It is abrown turkey fig. I went out about a week ago as the figs were becoming rip. When a fig is ripe it will
start the bending process. If you allow it to bend too far the birds, bees, and ants will enjoy it, but if you
pick them at the halfway bend point, you will have a tasty ripe fig to enjoy.One of the big questions you hear a lot about figs is the fact that they are higher in sugar, so can that be
good for you especially if you have blood sugar issues. In fact, figs are higher in sugar; however, they are
also higher in fiber which means the fiber helps to balance out the sugar impact. Remember fiber is
always our friend! It is also important to remember to add some protein to balance your figs out such as
a nice plain Greek yogurt. This will make a fantastic snack. Figs are full of vitamins and minerals such as
A, C, B6, K, Calcium, Iron, Potassium, Magnesium, Copper, Riboflavin, and Strontium. Eating foods with
said nutrition is far better than buying expensive supplements.
Figs are good for
Digestive health
Heart health
Skin health
Bone health
Fig leaves are also good for you when dried and made into tea. Studies have shown that the leaves help
with blood sugar control. As with any food, it is good to enjoy when in season. The only downside to figs
is if you take blood thinner medicine, to only consume in small amounts as the higher vitamin k can
interfere with your medicine’s absorption.This year with our reduced fig harvest, I decided to make a small batch of honey fig preserves. I love this
recipe because it is perfect to put a spoonful over my morning Greek yogurt. It adds a little sweetness
but not super sweet. I hope you will give it a try.Honey Fig Preserves
2lbs of fresh figs (frozen ones will work to)
2/3 cup of honey (I use Alapaha Honey)
1 cup of water (maybe a little less if frozen)
3 TBSP of lemon juice
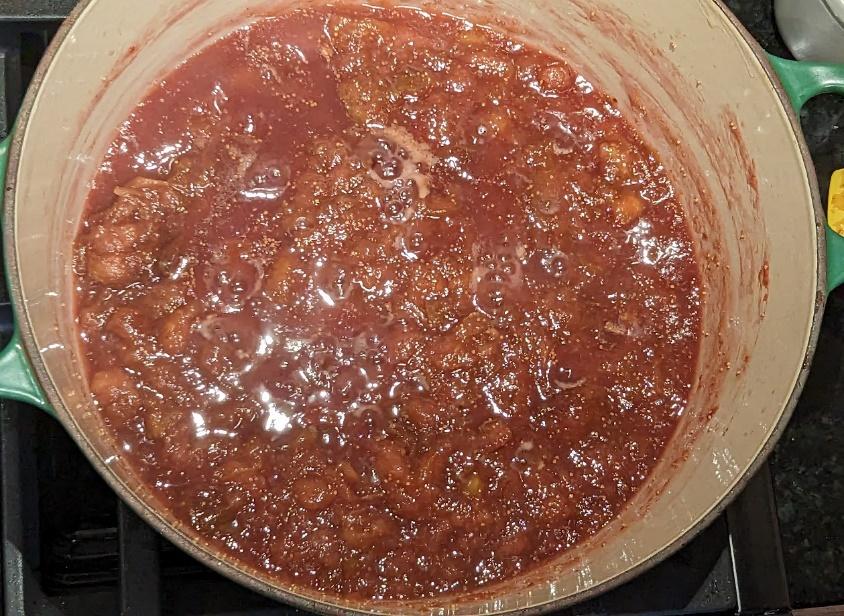
~Wash figs well and snip stems off.
~Place all ingredients into a pan and bring to a boil (I like to mash my figs first).
~Reduce heat and simmer until figs reduce to a thick jam/preserve and gel on the back of a cold spoon.
This takes about 40 to 45 minutes. Make sure to stir to keep from sticking.
~Jar up and use for fresh eating or freeze it for a longer shelf life. -
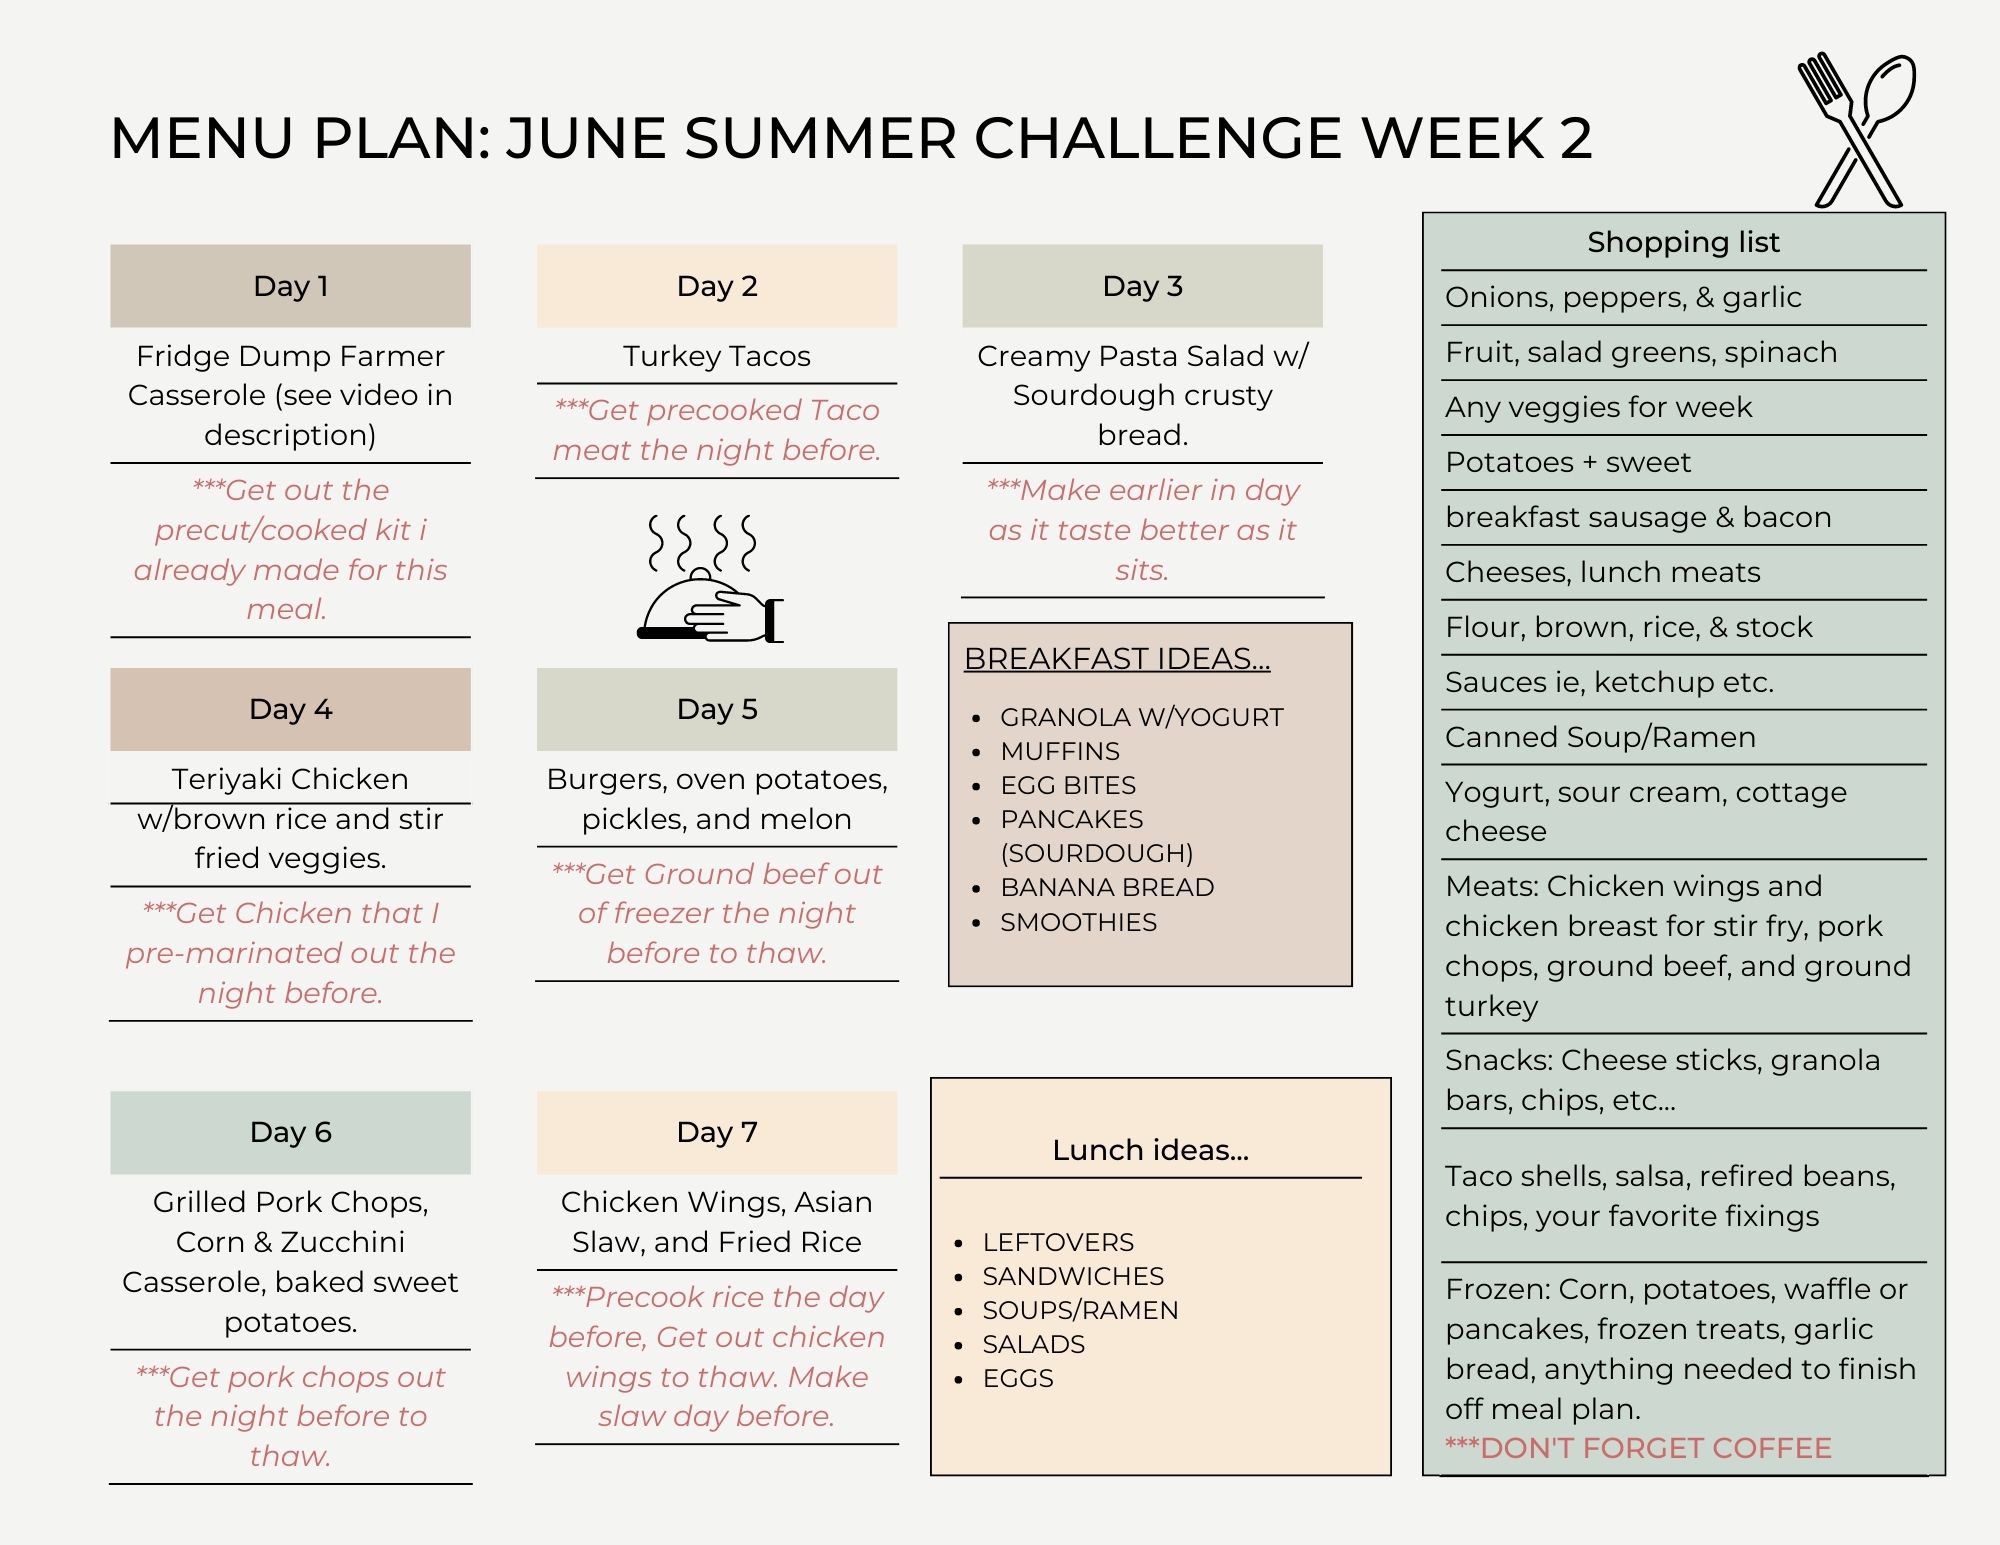
Summer Challenge 2023 Week 2
Welcome to the second-week of the Pantry Challenge for 2023. Watch the videos and get the free download for your family.
-
New Weber Griddle and Our First Cook
Grilled Chicken Wings and Corn – Easy Recipe
This is our first time cooking on our new Weber Griddle. We had the Blackstone Adventure, which is a nice, small griddle, but decided we wanted to try the Weber. The Blackstone has fierce adherents, and we respect that, but the griddle just wasn’t for us. We keep ours outside and the rear grease trap was unbearable (though the dogs loved it.)
The Weber Griddle heats evenly across all sections. If that’s something you like, you’ll like the griddle. Some folks like it cooler on the side. I don’t. I want even heating.
Super Complex Recipe:
- Infused Olive Oil, Cilantro and Roasted Onions, and your favorite seasoning
- Chicken Wings
- Corn
Real hard.

Here’s how it went:


